How To Easily Build A DIY Floating Bed With LED Lights

My recommendation [which is what we did] is to bring the cut list to your local lumber shop; we used Home Depot, and have them cut all of the wood for you. This saves you some time and materials.
Tools needed:
Miter saw We have Ryobi Tools; the price point and quality is great for our around the home projects.
Chop Saw [Mitre saw can be used for this]
Screws [We used one whole box]
Drill These are the drills that we have and use, and again, for our around the house projects, they’ve been wonderful.
Material list:
2×4″‘s [For the top frame]
2×6″‘s [For the bottom frame]
Full Sheet of 4×8’ Birchwood [This is for the mattress support]
1×4.5″ plank of wood of your choice. We used clear pine. [You can use a 1×6″ if they have it; this is for the decorative side/foot rails.
Cut list:
We based these measurements on a generic full size mattress. Once we built it and placed our Lull on it, we found we wished we had more space around the edges, so I would measure the mattress you’ll be using and go from there.
[2] 2×4’s at 74.5 inches
[5] 2×4’s at 50.75 inches
[2] 2×6’s at 61 inches
[2] 2×6’s at 38.25 inches
[1] 2×6 at 58 inches
The rest of the cuts I would do at home:
[1] 4×8′ birchwood cut to the length you made your platform. Use the strip you cut off from the bottom for the right sides of the bed, where the birchwood doesn’t reach. [On the wall side]
[2] 1×4.5″ planks for the trim pieces. We cut the footboard first to the width of the frame and the sideboard second, so that it would cover the raw edge of the footboard. MEASURE THE FINISHED DIMENSIONS OF THE FRAME BEFORE MAKING THESE CUTS.
Step 1: Bottom Platform; Use [2] 61″ and [2] 38.25″ 2×6 boards

Set the boards into a rectangular frame as shown above. Secure together with your drill and screws. We used 2 screws for each end [top and bottom] and went from the outside into the shorter boards. NOTE: THE BOARDS SHOULD BE PERFECTLY ALIGNED, WE JUST HADN’T SECURED THIS END PIECE YET.
Step 2: Platform Support; Use 58″ 2×6 board, drill and screws

Install your 2×6 support in the center of the bottom platform as shown above. [You can see the screw locations where each boards connects.] This is how we secured each piece of the frame.
Step 3: Top Platform; Use [2] 74.5″ and [2/5] 50.75″ 2×4 boards, drill and screws

Place your 2×4 boards in a rectangle, as shown above. Notice, the shorter 2×4’s are located on the INSIDE of the longer 2×4’s. Secure with screws from the outside.
Step 4: Platform Support; Use the remaining [3] 50.75″ 2×4 boards

Place them in the center of the rectangle, spaced evenly, as shown above. Secure with screws from the outside.
Step 5: Assemble the platforms; Use drill, screws and a stud finder

Stack the top platform on the bottom platform, like shown above. Find the studs and secure to the wall with screws. [We used 2 screws for every stud.] You’re also going to drill screws in at a 45 degree angle to secure the top platform to the bottom. We did this in the top platform’s support beams.
Step 6: Support Cantilever; Use remaining 2×4 board, miter saw, drill and screws


Cut your last 2×4 board at a 45 degree angle, on each end, after measuring the length needed, in the corner of the top platform. Then, secure it to the outer frame by drilling the screws into the ends from the outside. Repeat this process for the second, smaller piece. NOTE: This piece [top left end] will only need a 45 degree cut on one end, because the other will sit flush against the first support [bottom right end].
Step 7: Mattress Support; Use birchwood, drill and screws

Lay your sheet of birchwood down on top of the platform and secure to the cross beams with screws from the top. You can gently sand away any splinters created at the screw holes. NOTE: The birchwood isn’t wide enough for the bed frame, so we used the excess that we cut off of the bottom, to fill the space on the right side, by the wall. You can see the seam in the photo.
Step 8: The Trim Pieces: Use 1×4.5″ wood planks of your choice, stain, drill and screws

You can use whatever wood matches the aesthetic of your home. We used clear pine because that’s what we have everywhere. IMPORTANT: stain looks different on different woods. We have experimented over time to find that the Special Walnut stain by Minwax, on clear pine, matches our floors the best. [They are red oak wood with a 50/50 mix of Early American and Classic Gray.] We stained our precut planks and secured them to the bed frame, using 2 screws on each end. We stained it with one light coat [you can always go darker] and we did not seal it. I found these Minwax wipes that are a stain and finish in one! These would be perfect for this project, so you don’t have to buy a whole can of stain for this little job. A little stain goes a long way!
TIP: When installing the side/foot board planks, placing them approx. a 1/2″ -1″ higher than the top of the platform will create a tiny lip, keeping the mattress from sliding off.
LED Lights
Should you want to add LED lights underneath, it’s definitely a cool feature and adds a nice ambiance to the space! We got these Motion Sensor LED Lights off of amazon and just taped them underneath the bed. The ones I linked above were the perfect length for the full size bed. They plug into the wall, so you will need a nearby outlet. We happen to have one right at the foot of the bed, so it’s hidden. When they turn off, we just walk near the bed and they kick back on!
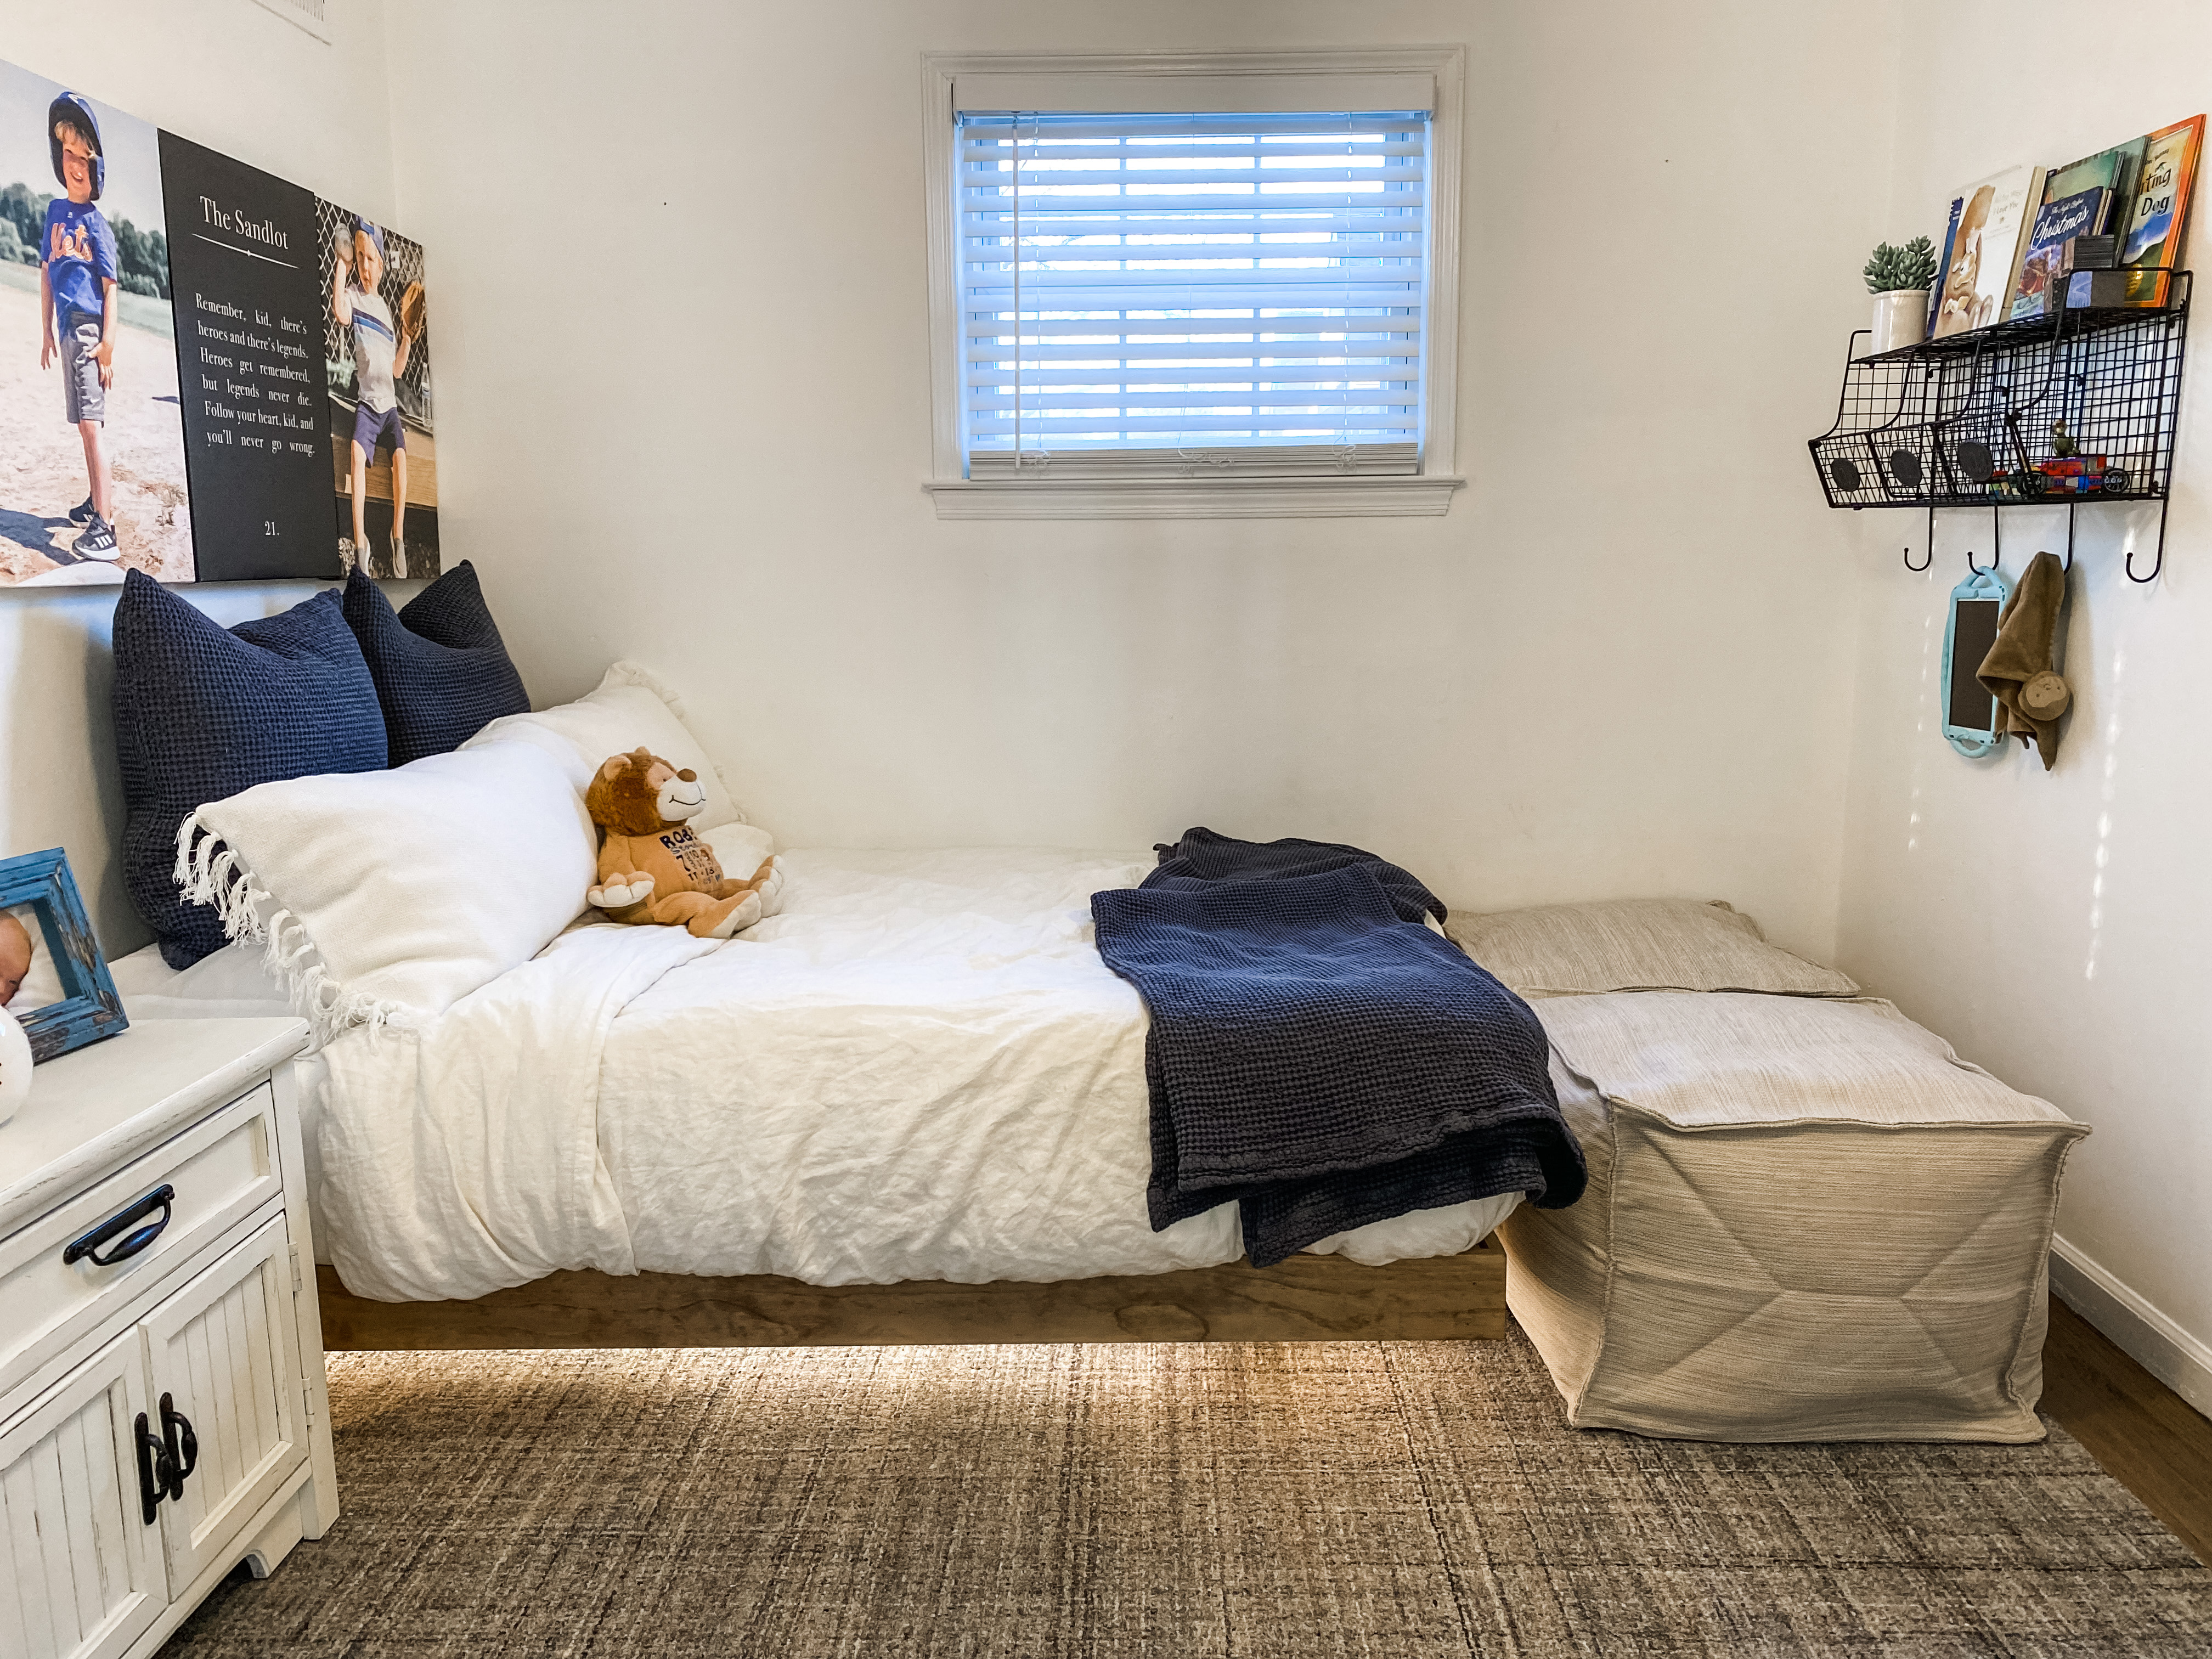
The Result

I partnered with Annie Selke to finish off the room with the rug, bedding, pillows and poufs. I chose not to get window treatments, but they have that and furniture too! This is my second partnership with them [I sought out both] because their quality is second to none. Check back for that post to be published in the next few days! Comment or email me with questions about anything you see! Follow me on Instagram or Facebook & you can message me there easily too!

I based the theme of the room off of these wrapped canvases I had made from Smallwoods Home. I wrote a post sharing all of my custom photo pieces; check it out here! I am also buying decals for the this blank window wall, to break up the white.

**If you want to create this look in the center of a wall, repeat the cantilever process for both bottom corners, stack the platforms centered on one another and secure them at the top, making sure you’re screwing into studs.
As always, thanks for reading and I hope you found this helpful!
XOXO
Kel
Follow me on your favorite app!


One thought on “How To Easily Build A DIY Floating Bed With LED Lights”